Help & Support 02 9161 8036
Welcome Guest

Recipes: dessert

Banana Fritters

Posted on 29 May, 2024
Banana Fritters

Makes 20 Fritters

Prep Time: 5mins plus 30mins waiting time

Cook Time: 30mins

Total Time: 50mins plus 35mins waiting time

1. Add AP flour, rice flour, sesame seeds, coconut, baking powder and sugar to a medium sized bowl. Mix until well combined. Add water and mix to form a batter. Set aside for 30mins.

2. Peel bananas and split in half, lengthways. Sit each piece of banana flat side down, then flatten the curved side with the blade of a cleaver or large knife.

3. Heat oil in a wok or large pot on medium heat. The oil is ready when a bamboo chopstick/wooden spoon starts bubbling when placed in the hot oil.

4. Prepare and cook fritters in batches. Dip bananas, one at a time, into the batter to coat then carefully slide into the hot oil. Do not overcrowd the oil. Cook until lightly golden, turning occasionally when needed. Drain on a wire rack and repeat with remaining bananas.

5. Turn up the heat on the oil and re-fry the fritters. You can crowd the oil in the second fry. Fry until golden and crunchy. Rest on a wire rack.

6. Serve fritters on their own, with a side of ice cream, coconut butterscotch sauce, or all of the above!
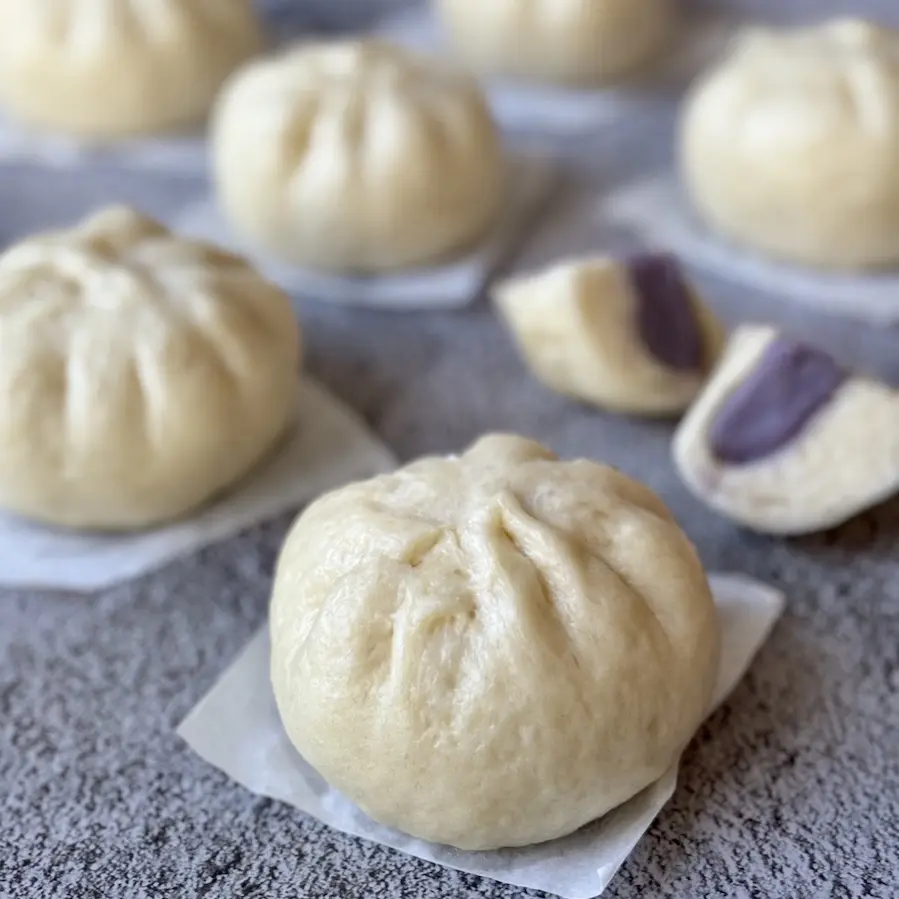
Steamed Taro Buns

Posted on 01 May, 2024
Steamed Taro Buns

Makes 12 large buns

For the Taro Paste Filling

  1. Cut taro halves in half then slice into 5mm thick slices.
  2. Place taro into a large steamer basket then steam over rapidly boiling water for 30mins or until cooked.
  3. Add cooked taro into a food processor, along with coconut milk/cream, sugar and a drop of ube flavouring. Blitz until smooth.
  4. Transfer taro puree to a large non-stick pan.
  5. Cook taro puree on medium heat. Steam will be released as the water evaporates from the puree. Keeping moving the puree around in the pan with a spatula to prevent any dark spots from forming. Continue doing this until your puree turns into a paste.
  6. Take off the heat and allow to cool completely. You can make the paste ahead of time and chill in the fridge. The paste will set further on cooling.

For the Buns

  1. Add sugar, yeast and water to a bowl and mix. Leave for 10mins.
  2. Add flour to the bowl of a stand mixer. Make a well in the centre and pour in the yeast mixture. Mix on speed 1 for 10mins. If you don’t have a stand mixer, knead with your hands until the dough is smooth.
  3. Form the dough into a ball and place in an oiled bowl and cover with cling film. Set aside for 90mins.
  4. Mix baking powder and water together in a small bowl. Set aside.
  5. After 90min, transfer your dough to a work surface. Roll out into a large rectangle. Pour baking powder mix onto the dough. Fold the dough over the liquid and gently knead until the dough feels smooth (about 2 mins). Divide your dough into 12 equal parts. Form into balls then cover with cling film and allow to rest for 10mins.
  6. Divide your prepared taro paste into 12 equal parts and form into balls.
  7. Roll out your ball of dough and place a ball of filling in the centre. Gather the dough around the taro filling and pinch together to seal at the top. Place on a square of baking paper and into a steamer basket. Repeat until all 12 buns are made.
  8. Add a splash of vinegar into a pot of water and bring to the boil. Lightly mist your buns with water (optional) then steam for 10mins. After 10mins, turn off the heat but DO NOT OPEN THE LID. Leave steamer undisturbed for 3mins before opening the lid.


Serve hot.


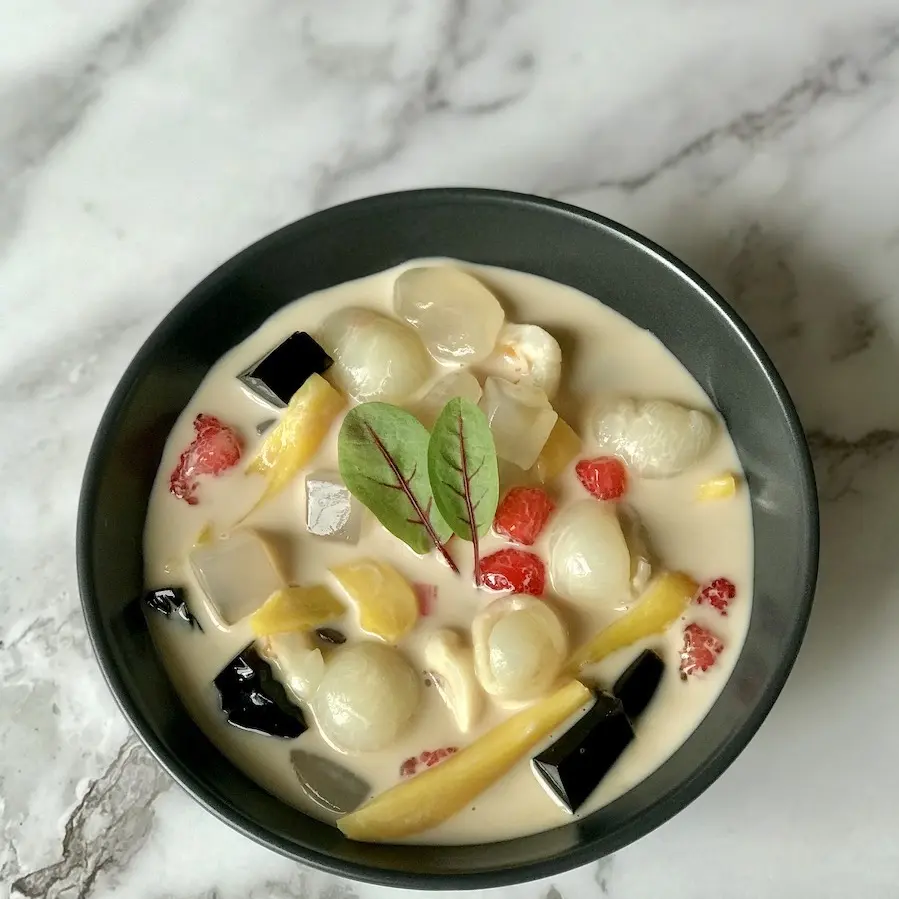
Che Thai

Posted on 27 Feb, 2024
Che Thai

Serves 12-15

Make the Red Rubies

  1. Bring a medium pot of water to the boil.
  2. Meanwhile, add the chopped water chestnuts to a medium sized zip lock bag. Add food colouring then mix to colour the chestnuts. Add tapioca floor. Seal the bag then toss to coat all the chestnuts with the tapioca starch.
  3. When the water is at a raging boil, slowly pour in prepared chestnuts, dispersing them in the water to avoid clumping. The red rubies will rise to the top when cooked. Allow them to continue to bubble for a couple of minutes before draining/scooping out into a colander. Rinse with cold running water to remove any excess starch and colouring. Add cooked red rubies to a bowl of iced water.

Put it All Together

  1. Drain lychees, jackfruit, longan and coconut jelly, but reserve the syrup in a large jug.
  2. Slice lychees in half and jackfruit into strips. Add them, along with the longan and coconut jelly into a large mixing bowl.
  3. Add in grass jelly cubes and rinsed toddy palm seeds.
  4. Add in evaporated milk.
  5. Add in reserved syrup to taste (about 2 cups).
  6. Finally, drain red rubies from their cold water bath and add them in this mix. Stir to mix everything through then chill well before serving.

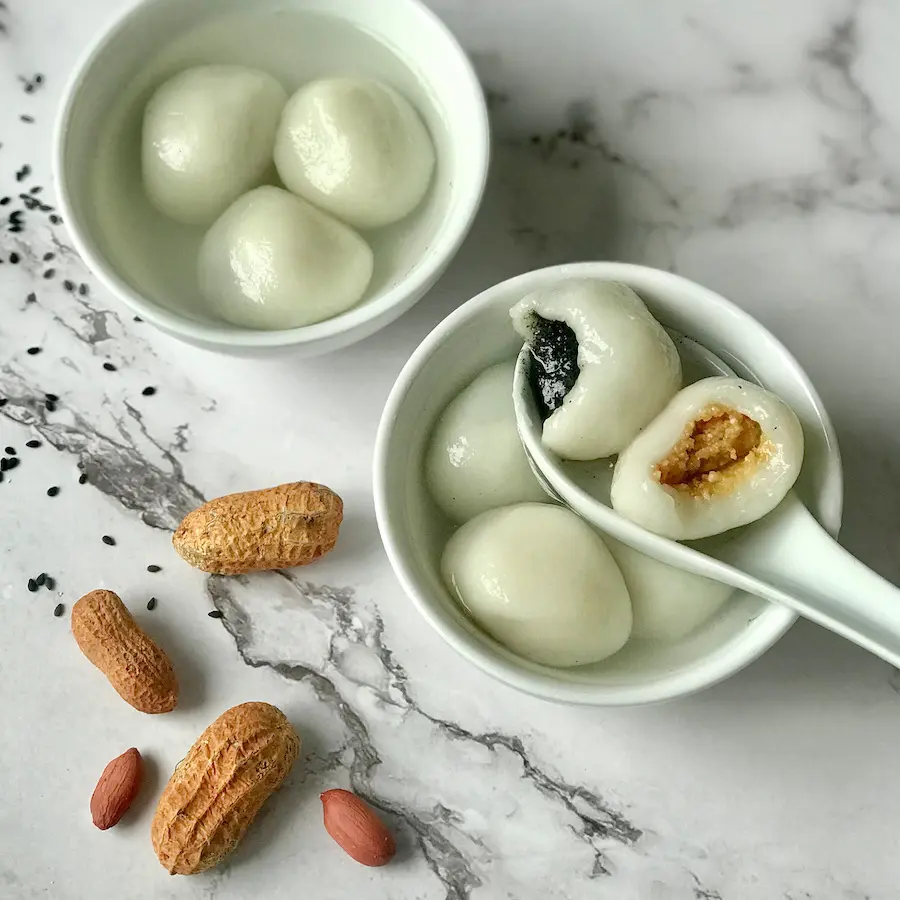
Tang Yuan

Posted on 08 Feb, 2024
Tang Yuan

Prepare the Black Sesame Filling

  1. Toast the sesame seeds in a dry pan for 5-8 mins on medium-low heat, stirring continuously until fragrant. Cool completely before adding to a food processor. Blitz to grind seeds to a paste. Add sugar and pulse to combine. Add butter and pulse to combine. Place filling in a bowl, cover and chill for 30 mins to harden.
  2. Once the filling is chilled, you will be able to portion it into little 5g balls. If the balls are too soft, return them the fridge for another 10-20 mins to set before continuing. 

Prepare the Peanut Filling

  1. Toast the peanuts in a dry pan for 3-5 mins on medium-low heat, stirring continuously until fragrant. Allow to cool completely. I like to pound my peanuts using a mortar and pestle until they resemble rough sand. Add sugar and mix through. Add butter and mix through. Place filling in a bowl, cover and chill for 30 mins to harden.
  2. Once the filling is chilled, you will be able to portion it into little 5g balls. If the balls are too soft, return them the fridge for another 10-20 mins to set before continuing. 

Prepare the Dough

  1. Add glutinous rice flour and potato starch in a bowl. Slowly add in the water, stirring as you go until a smooth ball is formed. You may not need all the water.
  2. Break off 12-13g balls from your dough. Make rice balls one at a time, flattening the dough ball into a disc, placing a ball of filling in the middle then enclosing the dough over the filling. Roll the ball in your hands until it’s round and smooth. Set aside while you make the rest of the balls.

You can freeze the balls at this stage (do not allow them to touch) and cook them at a later stage.

Prepare the Sugar Syrup

  1. Add sugar, water and ginger slices to a large bowl. Bring to the boil, stirring to melt the sugar. Once the syrup starts to boil, reduce the heat to low until it is ready to receive the rice balls.

Cook the Tang Yuan

  1. Bring a large pot of water to the boil. Cook your tang yuan in batches by slowly adding into the boiling water. Carefully nudge them so that they don’t stick to the bottom of the pot and to each other. After one minute, remove them with a slotted spoon and transfer them directly into the simmering sugar syrup. Cook for a further minute or until they rise to the top.

Serve tang yuan warm in a bowl partly filled with the sugar syrup.

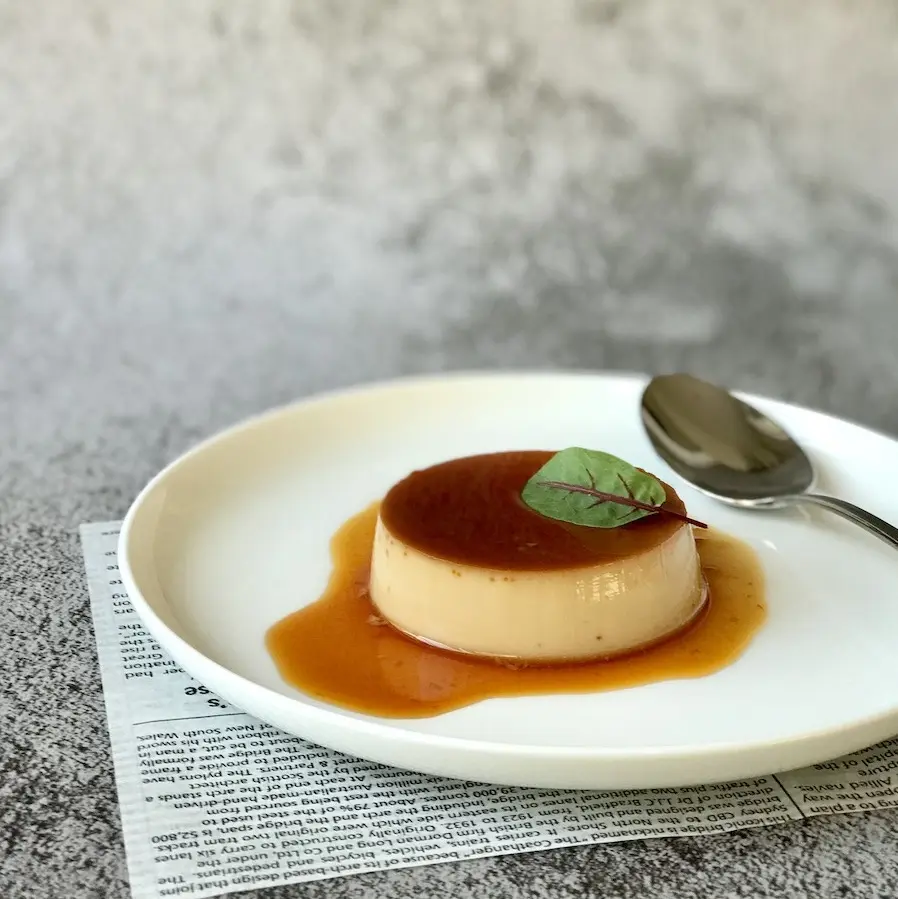
Vietnamese Coffee Flan

Posted on 10 Jan, 2024
Vietnamese Coffee Flan
  1. Preheat oven to 170C.
  2. Make the caramel by adding the sugar and water to a pan. Use a light coloured pan so that you can see the colour of your caramel develop. Heat on high and do not stir. Gently swirl the pan from time to time to disperse any dark spots forming. Your caramel is ready when it turns dark brown. Immediately pour into the bottom of your ramekins.

We used 12 x125mL capacity ramekins for this recipe.

  1. Add eggs, egg yolks, condensed milk, vanilla and salt into a large bowl. Whisk until well combined. Set aside.
  2. Heat fresh milk and coffee into a small pot to warm through (do not boil). Slowly pour this mix into your egg mix, whisking the egg mix as you pour. Pass this thin custard mix through a fine sieve into a pouring jug. Use a spoon to remove/pop any air bubbles.

Pour custard into the ramekins (not all the way to the top) and cover each ramekin with foil. Pierce holes in the foil to allow steam to escape.

  1. Place prepared ramekins into a deep baking pan. Pour hot water into the baking pan until it reaches half way up the sides of your ramekins. Bake for 25-30mins or until the custard has just set. If unsure, insert a toothpick into the centre of one flan. If it comes out clean, the flan is cooked.
  2. Take ramekins out of the baking pan and remove foil. Allow to cool on the bench top (about 30 mins) before moving them into the fridge. Allow your flans to set and chill in the fridge for at least 4 hours before turning out.
  3. To serve, run a knife around the edge of each flan before inverting onto a plate.

Mango Sticky Rice

Posted on 05 Dec, 2023
Mango Sticky Rice
  1. Add rice to a large bowl and fill with tap water. Leave to soak overnight.
  2. The next day, drain and rinse the rice under cold running water. Line a steamer basket with baking paper then fill with drained rice. Steam for 30 mins.
  3. Add 85mL coconut milk, caster sugar and salt into a large bowl. Mix to dissolve the sugar then add to the freshly steamed rice. Mix until everything is well combined then set aside for about an hour for the coconut milk to absorb into the rice.
  4. Meanwhile, make the coconut sauce by adding 315mL coconut milk, sugar and salt to a small pot.
  5. Tie the pandan leaf into a knot and add to the pot. Heat to dissolve the sugar. Simmer for 5 minutes then remove from the heat. Remove and discard the pandan leaf.
  6. Peel your mangoes then cut 2 mango cheeks from each mango. Place each cheek flat onto your cutting board and slice into a more bite sized pieces.
  7. Spoon a mound of sticky rice onto each serving plate. Place one cheek of mango next to each mound. Drizzle on coconut sauce and garnish with toasted peanuts and sesame seeds.

Taro Snow Skin Mooncake

Posted on 27 Sep, 2023
Taro Snow Skin Mooncake

Part A. Make the Filling

200g frozen taro, thawed & cut into 2cm chunks
70g caster sugar
2T cornflour
2T coconut milk
1T cornflour

1. Steam taro for 30mins or until fully cooked through.

2. Place cooked taro in a med bowl and mash. Add the rest of the ingredients and mix together. Push through a fine sieve to remove any lumps.

3. Cover with cling film and place in the fridge to chill and set.


Part B. Make the Snow Skin

40g glutinous rice flour
40g rice flour
20g wheat starch
20g caster sugar
150g full cream milk


20g canola oil
A drop of ube/purple food colouring

4. Add flours, wheat statch, sugar and milk into a heatproof bowl. Whisk until smooth then cover the bowl with cling film. Steam for 20mins or until the centre is fully set.

5. Remove bowl from the steamer and discard the cling film. Add in oil and carefully work it into the mix.

6. Break off 1/3 of the dough and add food colouring. Knead the colour through then divide into 10 even portions. Divide the white dough into 10 even portions.

7. Pair one portion of purple dough with one portion of white dough. Continue until you have 10 pairs of purple and white dough. Cover with cling film and allow to cool completely.


Part C. Make the Snow Skin Mooncakes

8. Divide the prepared taro filling into 10 equal portions and form into balls.

9. Grab one blue and white dough combo. Form into a ball and roll into a disc. Wrap the disc around a taro ball and seal completely. Shape using the mooncake mould. You can use a little cornflour if you’re finding the dough a little sticky.

These mooncakes are best enjoyed on the day they are made.

PS: If you don’t have mooncake moulds, you can just present these sweet treats as taro and coconut filled mochi balls! Go one step further if you want to unleash you inner creative skills … shape the mochi balls into cute figurines like bunnies, kittens, hedgehogs etc by using a small pair of pointed sharp scissors to snip in ears and spines.


Red Bean Soup

Posted on 08 Aug, 2023
Red Bean Soup

Serves 12

1. Rinse then soak the beans in cold tap water overnight.

Prepare the Sago

2. Add water to a large, deep pot and bring to the boil. Add in sago and give it a stir. Immediately reduce the heat to low when it comes to the boil. Cover with a lid and gently simmer for 15mins (stirring every 5mins). Turn off the heat and keep the lid on. Let sit for 25mins.

3. Drain cooked sago through a fine sieve and rinse thoroughly with cold tap water to remove the excess starch. Place cooked sago in a large bowl filled with iced water and set aside.

For the Soup

4.Rinse the beans then add to a large pot. Add sugar, tangerine peel and fresh water, then bring to the boil.

5. Reduce heat and gently simmer for 90mins or until beans are cooked to your liking. Remove the tangerine peel.

6. I like to give this mix a light blitz so that the soup has a mix of whole cooked beans and mashed beans. Blitz or don’t blitz. Blitz as much or as little as you desire.

7. Add in the orange zest, stir and heat through.

8. Drain prepared sago and add into the soup. Stir to mix through then taste for sweetness. Adjust as needed. Serve hot or warm.

Almond Nectarine Slice

Posted on 18 Jul, 2023
Almond Nectarine Slice
  1. Preheat oven to 180C.
  2. Grease and line a 13cm x 33cm baking tray with baking paper.
  3. Using electric beaters or stand mixer, cream butter and sugar until light and fluffy.
  4. Beat in eggs one at a time. Add vanilla and beat through.
  5. Sift in flour and salt. Fold through with a spatula.
  6. Add almond meal and mix until well combined.
  7. Spoon mix into prepared pan and spread evenly. Stud with sliced nectarine and ¾ of the blueberries. Evenly scatter flaked almonds on top.
  8. Bake for 30-35mins until golden.
  9. Meanwhile, dissolve 2T caster sugar in 2T boiling water and set aside. When the slice comes out of the oven, brush the top of the slice and fruit with this sugar syrup for a glossy finish.
  10. Garnish with remaining fresh blueberries and lightly dust with icing sugar (optional).

Allow the slice to cool in the pan before cutting.

Thai Milk Tea

Posted on 11 Jul, 2023
Thai Milk Tea

Serves 4

To make the Thai milk tea

  1. Add the tea mix to a large pot. Pour in just boiled water and steep for 5mins. Strain tea leaves through a fine sieve (I recommend using a tea sock).
  2. Add condensed milk and stir to dissolve. Chill until ready to use.

To make the Egg Custard Pudding:

  1. Add 65mL of milk in a small bowl. Sprinkle gelatine powder on top and set aside.
  2. In a large bowl, add egg yolks, sugar and vanilla and whisk to combine.
  3. In a medium sized pot, heat remaining 185mL milk until it just comes to the boil. Pour this warmed milk into the egg mix and whisk to incorporate. Pour this egg and milk mix back into the pot and simmer for 2mins, stirring continuously.
  4. Add gelatine mix into the pot and stir on med-low heat until the gelatine has completely dissolved.
  5. Strain mix through a sieve into a small, clean container and chill to set (at least 4 hours, best overnight). Once set, cut pudding into cubes.

Other components:

  1. Prepare brown sugar pearls according to the packet instructions.
  2. Drain the grass jelly and cut it into cubes.

Tips:

  1. we like to dissolve caster sugar in some drinking water and store the cubes in this mix.
  2. Make you drink by layering the toppings any which way you like and enjoy.

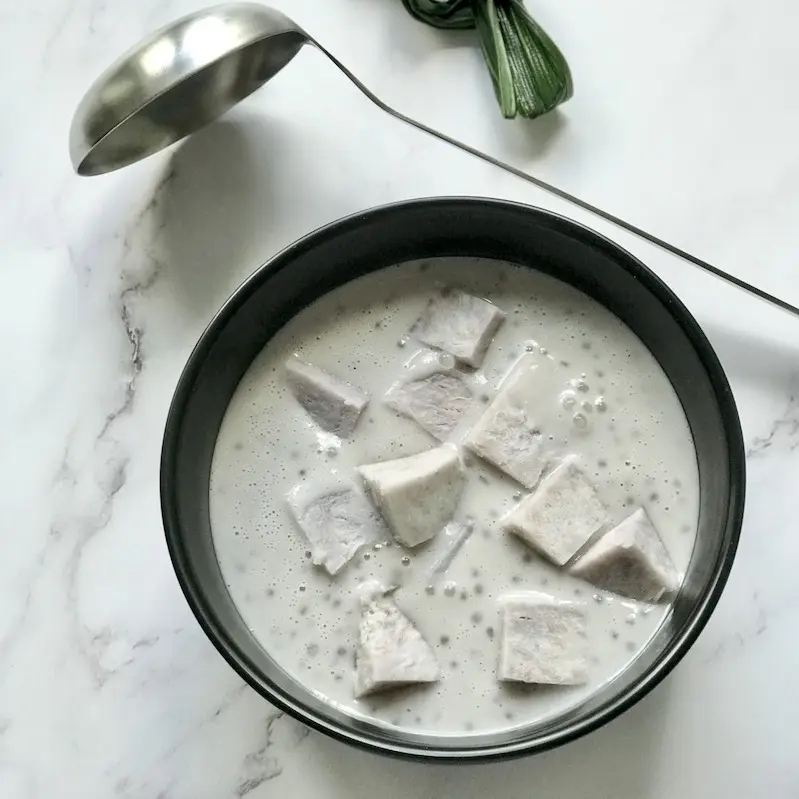
Taro Coconut Sago Dessert

Posted on 23 May, 2023
Taro Coconut Sago Dessert

Prepare the Sago

  1. Add water to a large, deep pot and bring to the boil.
  2. Add in sago and give it a stir. Immediately reduce heat to low when it comes to the boil. Cover with a lid and gently simmer for 15mins (stirring occasionally).
  3. Turn off the heat and keep the lid on the pot. Let sit for 25mins.
  4. Drain cooked sago through a sieve and rinse with cold tap water to remove the excess starch. Place cooked sago in a large bowl filled with iced water and set aside.

Prepare the Taro

  1. Bring a pot of water to the boil.
  2. Split taro evenly between 2 steamer baskets.
  3. Steam for 20mins or until cooked. Set aside.

For the Soup

  1. Add coconut milk, water, sugars and knotted pandan leaf into a large pot and bring to the boil
  2. Stir to dissolve the sugar.
  3. Remove the pandan leaf
  4. Add in half of the cooked taro and blitz with an immersion blender/stab mixer until smooth.
  5. Drain prepared sago and add into the coconut soup. Stir to evenly distribute. Add salt.
  6. Add in cooked taro pieces and gently stir through.


This recipe makes a very generous portion, so there should be plenty of leftovers, or gather some friends or loved ones and share it together.


Quick Pandan Kaya Toast

Posted on 14 Feb, 2023
Quick Pandan Kaya Toast
  1. Scoop out the thick cream from the coconut cream container/tin and add to a small pot (leave behind the thin, watery liquid).
  2. Add in sugars, salt and a couple of drops of pandan flavouring (a little goes a long way). Gently and stir everything in the pot until all the sugar has dissolved. Turn off the heat.
  3. Place egg yolks in a medium sized bowl. Whisk to combine.
  4. Continue to whisk the egg yolks as you gradually add in the warm coconut cream mix.
  5. Add this egg and coconut cream mix back into the pot and gently heat. Continue stirring this mix with a spatula until it thickens (about 5-8mins) in the gentle heat.
  6. Toast some bread & spread your kaya jam over. Add a slab of butter as pictured. PURE INDULGENCE! 

Notes:

  • Your kaya will thicken further after it cools.
  • Allow your kaya to cool then spoon into a sterilised jar and chill before serving.
  • You can use real pandan leaves but we find using pandan flavouring saves so much time! 

Banana Bread Cake

Posted on 07 Feb, 2023
Banana Bread Cake

1. Peel bananas and slice in half lengthways. Sprinkle on sugar and gently toss to coat. Leave to marinate for a couple of hours.

2. In a very large mixing bowl, add condensed milk, coconut milk, fresh milk, melted butter, egg, vanilla and salt. Whisk to combine.

3. Cut baguettes into 1” long slices on the diagonal. You should roughly get 5 slices out of each baguette. Add baguette slices into the mixing bowl and coat with the ‘custard’. Leave for 15mins to soak.

4. Preheat oven to 180C. Grease and line a 20cm tall round cake tin.

5. Build your cake, layer by layer. Start with a base layer of soaked bread. Make sure the pieces are tightly packed and there are no gaps. Use half of your bread for this layer.

6, Next, arrange half of your bananas to form the next layer. Keep your bananas flat with no overlapping.

7. Add the remaining soaked bread to form the next (third layer). Gently pressed down on the cake to remove any air gaps.

8. For the final top layer, arrange your bananas, cut side up. This is the presentation layer. Gently press down so that the bananas nestle into the bread layer.

9. Bake for about 70 mins.  Cover the top with a piece of foil at around the 45min mark to prevent the top from getting too dark. Remove the foil 15mins later to allow for the top develop a nice golden top until the end.

10. Leave the cake to cool in its tin. Chill overnight to set in its tin.

11. Turn out cake and then serve.

Mango Pudding

Posted on 07 Feb, 2023
Mango Pudding

Makes 10-12

Prep: 20mins plus time overnight for setting

Cook: 10mins

Total Time: 30mins plus time overnight for setting

Make the mango puree:
1. Peel and cut up 4 ripe mangoes. Blitz the flesh in a food processor and transfer to a pot.

2. On medium heat, reduce the liquid until you end up with about 2 cups of puree. Be sure to stir constantly to avoid the liquid catching and burning in the pot.

3. Strain the puree through a fine sieve to give you a smooth puree. Set aside.
 

For the pudding, you will need:
1. Add gelatin to med-large sized heat-proof bowl. Pour in water and whisk to dissolve the gelatin.

2. Add in salt and caster sugar. Whisk to dissolve.

3. Pour in evaporated milk and mango puree. Stir until everything is well combined.
4. Using a fine sieve, strain the mix into a large heatproof jug. Fill glasses with pudding mix then add in diced mango to each cup.
5. Refrigerate overnight to set.
6. Pour evaporated milk onto your puddings just before serving.

Fruit Platter

Posted on 25 Sep, 2022
Fruit Platter


A classic fruit platter never loses. There’s no need for special carving tools or skills. Just bring along fruits, a sharp knife and chopping board.

Be sure to wash and dry all your fruit before you start.

A classic fruit platter is a balance between making it look aesthetically pleasing, and making it work for your guests. As a guide, keep the leaves on strawberries and cut small whole fruit like kiwifruit and mandarins in half to showcase their details. Cut mango cheeks into a lattice pattern and invert to accentuate the cubes formed. 

Build your fruit platter by starting with large pieces of fruit first. Be sure to alternate colours, shapes and textures. Use smaller fruit like berries and grapes as fillers to awkward gaps and for that final decorative touch.

If you’re after something that hits differently, put together a plate of fruit skewers. Anything served on sticks is always a winner. Am I right, or am I right? You can also stuff whole lychees (tinned) with a piece of pineapple if you find that your pineapple needs a helping hand in the sweetness department.


Even easier, you can skip threading fruit onto skewers altogether and offer a plate of fruit pieces with food picks on hand.

Serve with a dipping sauce like a side of choclate dip  … or yoghurt … or custard … or this pandan coconut number …

To make this dipping sauce:

1. Heat up one 400mL can of coconut milk in a small pot

2. Add in 70g shaved palm sugar.

3. Bring it to the boil then turn down the heat to a gentle simmer.

4. Stir to dissolve all the sugar then add in a couple of drops of pandan flavouring and a pinch of salt.

5. Taste and adjust if necessary, then turn off the heat. Allow to cool before serving.

Durian Shake

Posted on 13 Sep, 2022
Durian Shake

1. Defrost durian (though ensure it is still sem-hard) and cut into pieces. 

2. Put all ingredients in a blender and blitz until its blended to your preferred consistency. 

Enjoy 

p.s. more condensed milk can be added if you prefer it sweeter. Same goes for ice and milk. If you like a more watery consistency, add more milk and ice. If you like it on the thicker side, then leave as is :)